As Marine Private Tommy Conlin, you must survive the hell of Pacific Theater of Operations - starting from Pearl Harbor attack, finishing on Allied victories over Pacific (about 35 levels). The game uses a greatly improved Medal of Honor engine, with Havok system physics, dynamic lighting, mirroring effects, detailed textures, real-world visuals and many more. The Artifical Intelligence system was coded from the beginning, and has squad tactics improved to create real, emergent environments. Also, many gameplay enhancements are added, such as calling a medics (seen in Wolfenstein: Enemy Territory before) when you're badly wounded. This all creates a great game, which gives awesome, movie-like experiences. Do you remember the famous Omaha Beach mission from first Medal of Honor, and the feeling of being a small part in a great machine, a feeling that your life is dependant actually only on your enemies and brothers in arms? You can feel it on every step in Medal of Honor: Pacific Assault.
Upscaling LithTech Engine games
Introduction
I made No One Lives Forever Upscale mod, and since methods and tools are basically the same, I'm going to write a tutorial on how to do the same with other games, based on the same engine (this article is mostly for engine v2.x).
I'm not english speaking user, so please forgive me for some mistakes.
A little theory
There are several versions of LithTech Engine, but concepts are the same, at least for versions from 1.0 to LithTech Jupiter. All the game files packed into REZ archives. The format used for the textures is DTX (some variation of DXT compression). But here is the thing with DTX textures. Not only they contain image and its properties, but they also contain game logic properties, such as texture flags or material attached to this texture (if it's wood, it will sound like wood and so on) or attached detail texture. So if you just upscale texture and convert it to DTX using batch tools - this information will be lost. Also there is an alpha layer in this textures, and it is used for effects (defines transparency, environmental map reflection on parts of the image etc). If you are upscaling textures, you always need to upscale and retain alpha layer as well. Even if it solid white or solid black.
Now the second tricky part. If you will just upscale textures, convert them to DTX and pack them to REZ archive - it will break game scaling, all the textures on the levels will appear bigger (if you are using x4 scale factor for textures, they will render x4 bigger). That's because game uses UV Vectors for storing texture dimensions in level DAT files. And you need to correct this vectors in all the game levels for your upscaled textures to work properly. The only version of the engine that don't need such corrections is LithTech Jupiter (NOLF 2, Tron 2, Medal of Honor: Pacific Assault) - it uses UV mapping, and no matter how big is the texture - it will always render the same ingame.
For both of this issues I made scripts to automate the process. Scripts were wrote for NOLF version of the engine (LithTech 2), but with little corrections or even without any corrections they will work on any version.
Interface textures sometimes comes as paletted or unpaletted PCX, just treat them as common PCX and save and apply their original palette upon upscaling if there was any.
LithTech files versions
Lithtech 1.0 (DAT v56), uses DTX v1
Shogo: Mobile Armor Division
Blood II: The Chosen
Kiss Psycho Circus (Custom LithTech 1.5) (DAT v127), uses DTX v1.5
KISS: Psycho Circus: The Nightmare Child
Lithtech 1.5 (DAT v66), uses DTX v2
Might and Magic IX
Lithtech 2.x (DAT v66), uses DTX v2
NOLF1
Sanity: Aiken's Artifact
Legends of Might and Magic
Die Hard: Nakatomi Plaza
Lithtech PS2 (LTB v66)
NOLF1 (PS2)
Lithtech Talon (DAT v70), uses DTX v2
Aliens versus Predator 2
Lithtech Jupiter (DAT v85), presumably uses DTX v2
No One Lives Forever 2: A Spy In H.A.R.M.'s Way
Tron 2.0
Medal of Honor: Pacific Assault
Let's start
First of all we need to unpack REZ archive. There are number of tools for each game, I used more universal REZ Tool Pack for NOLF. I think REZ format is the same for every game, so its easier.
We will need WinRez LT Studio from there. Just open any REZ file with WinRezLT.exe. That's part of tutorial is basic, it's all simple and most of the modders already can do it.
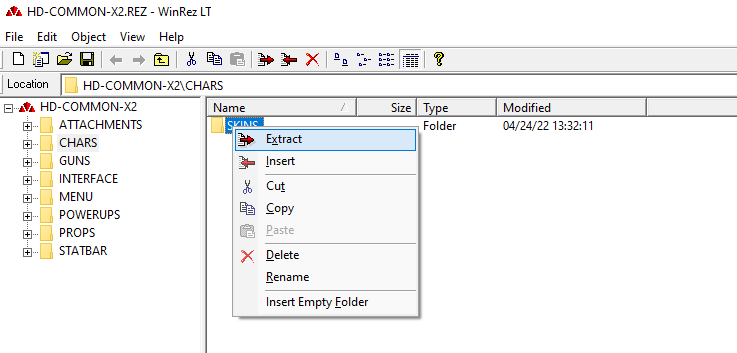
Now you need to extract everything you need. Usually game comes in several archives, you need to unpack every one of them. If there are REZ files from addons or patches you need to unpack them last, overwriting files of the unpacked main game (they could contain the same files, but patch REZ files contains newer/fixed versions).
In case of NOLF game textures were in folders:
ATTACHMENTS
CHARS
GUNS
INTERFACE
MENU
POWERUPS
PROPS
SFX
STATBAR
TEX
Levels were in WORLDS
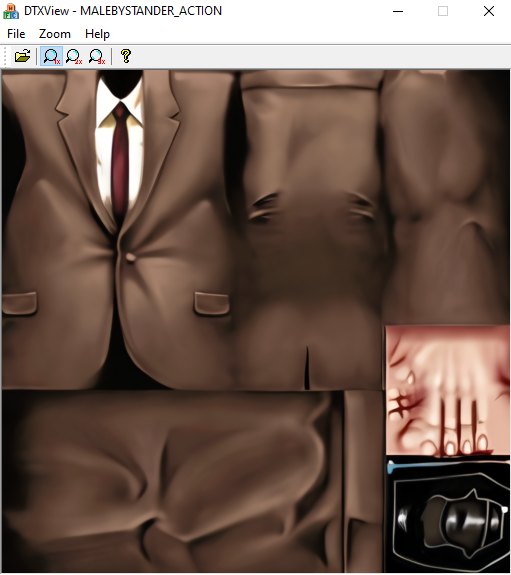
You can preview unpacked textures DTX files using WinRez LT Studio\DTXView.exe. For example
Some more theory on textures
It will be more NOLF specific part cause in other games it may be different. But overall logic may be the same. Some textures are used for models (characters, guns, props objects) and they don't need DAT editing. No matter how big is your texture - it will render properly. Some textures used for interface and you need to check every texture playing the game/navigating the menu cause there is no logic of which texture will render properly or which will render too big. So you will skip some textures and some will upscale. There are also textures for level geometry (ceiling, walls etc etc), they always need DAT file to be edited. And there are sprites which aren't upscalable cause they will render bigger and I didn't find where their vectors are stored in DAT. Sprites usually come this corresponding SPR properties file so maybe you will find out. I didn't find much visual differences so I just skipped them. There were some issues in NOLF for example, when sprites textures were used for level textures and vice versa, but I will wrote about it later.
For example NOLF folders structure:
ATTACHMENTS - model textures for scopes, silencers etc. Don't need DAT editing, just upscale and pack DTXs and it will work.
CHARS - model textures for characters. Don't need DAT editing
GUNS - model textures for guns. Don't need DAT editing
INTERFACE - interface textures, you need to check every upscaled texture ingame. Also contained textures for 3D models in interface which don't need DAT editing
MENU - interface textures, you need to check every upscaled texture ingame. The only texture in NOLF that rendered properly was intro splash
POWERUPS - model textures for powerups (ammo, armor etc). Don't need DAT editing
PROPS - model textures for props (trees, lamps etc) used as models. Level object not always placed as props, sometimes they are part of the level, but such objects not in this folder. Don't need DAT editing
SFX - sprites. I totally skipped this folder only made exceptions in DAT files for whose sprites used as level models.
STATBAR - interface textures, you need to check every upscaled texture ingame
TEX - level textures. You NEED to edit DAT files for this textures to render properly. There was one folder in NOLF (TEX\FLARES) where this textures weren't used in levels but were used as sprites and needed to skip them. But such issues can only be found upon playing the game with completed upscale mod.
WORLDS - levels DAT files themselves
DTX proceed
So, you unpacked everything and now have a bunch of DTX files. Let's convert them to TGA files so we can work with them. I used DTX Utility 7.0. You may need some system dlls that aren't included with the program. I'll try to upload them later. The best thing is that it is batch utility and you can convert all the files in all the folders in one click. Just create cmd file and insert this for DTX to TGA conversion
@echo off
for /R %%a in (*.dtx) do (
"dtxutil.exe" "-dtx2tga" "%%a" "%%~pa/%%~na.tga"
)
And create another one for TGA to DTX
@echo off
for /R %%a in (*.tga) do (
"dtxutil.exe" "-tga2dtx" "%%a" "%%~pa/%%~na.dtx"
)
You can use your paths to dtxutil.exe or just copy utility and cmd files to the folder with textures - your choice. Now you have a lot of TGA files to upscale.
I will not explain how to use AI to upscale textures, I suggest your know. And where are a lot of tutorials out there. Personally I used ESRGAN and IEU.Winforms GUI for it. You can also use Cupscale GUI. Just remember to upscale alpha channels.
One small thing: if you're upscaling transparent textures with alpha layer used for transparency - manually fill solid white/black parts of the alpha layer. Cause upscaling process may shift colors a little and instead of solid black #000000 you'll get something like #010201. It will appear black to you, but game will not properly apply transparency to this parts of the image.
P.S. DTX Utility for sure works with DTX v2, but I'm not sure if it will work with other versions, at least for TGA to DTX conversion. You may need to find SDK for you game for proper utility. You can also use level editor DEDIT for your version of the game, but it is not so comfortable to use (You definitely will need this for DTX v1).
Backconverting to DTX
I suggest the main and most time-consuming upscaling part is over and you have a lot of TGA files on your hands. There are two ways of dealing with them.
The easiest way is to use dtxutil and batch convert them as you converted them from DTX (use this for DTX v2).
BUT
Dtxutil only supports textures with maximum size of 1024x1024. In NOLF there were several textures with their maximum size being 2048x2048 after upscaling. The only way of dealing with them is to use modified DEDIT with support for large textures.
I used DEDIT 2.2 for this (it will support textures for any game on LithTech 2.x engine and any game that uses DTX v2). It certanly works with NOLF and AvP2 (however AvP2 had it's own editor with large texture support).
Download and unpack DEDIT 2.1, make a copy of it and overwrite DEDIT 2.2 on top of it. You don't need to do the whole installation part from readme, we'll just use it for converting.
Download Patched DEDIT with support for large textures based on NOLF2 editor and overwrite it to DEDIT 2.2.
Alternatively you can use DEDIT from AvP2 and put Large Texture Support dll into it. It works both ways. In last version Large Texture Support dll also supports Blood 2, KISS: Psycho Circus and NOLF (LithTech 1.0, LithTech 1.5 and LithTech 2.x).
Instruction for DEDIT conversion
- Lauch DEdit.exe
- Create new project with default directory
- It will say something about error. Just click OK
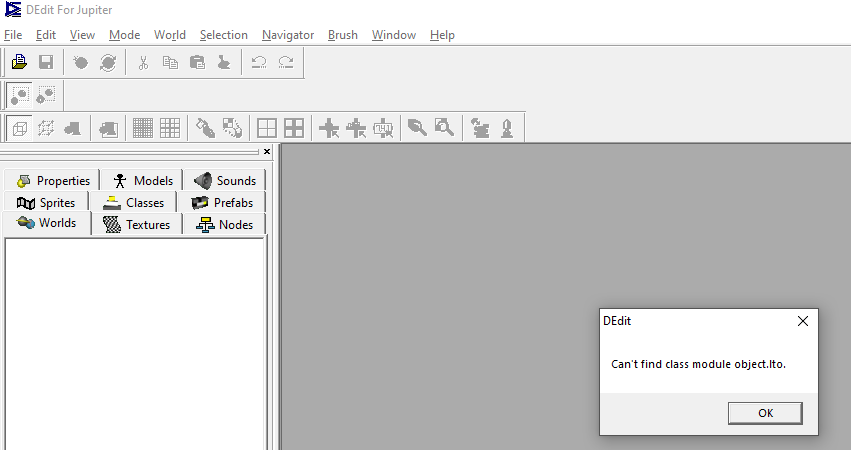
- Create a new world - yes. Enter any name
- Choose Textures tab and click once on Textures folder icon.Now right click under the "Name" field on empty space and choose Import TGA Files
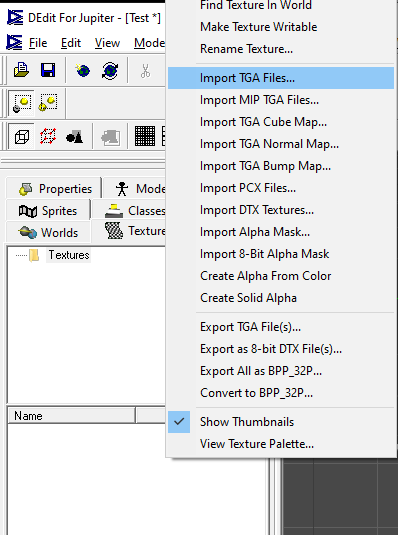
- Select your files. DEDIT will automatically convert them to DTX and put into directory of your project (for example: DEDIT2.2\Project0\Textures\). Now you can take them and close DEDIT. We don't need it anymore.
Transfering DTX Meta information
As I said before, DTX files had specific engine information besides the textures and you need this information to be saved. But the proccess of DTX > TGA > Upscaled TGA > Upscaled DTX deletes this information. So I wrote a python script for this. It's for Python 3 and called DTX-Meta-Transfer.
For now it only supports DTX v2, but I can rewrote it to DTX v1 or DTX v1.5 if you will provide me with examples. Or you can do it yourself sometime).
P.S. I already rewritten it to support DTX v1
Theory
I used 010 Editor for researches and have some templates for it for DTX v1, DTX v1.5 and DTX v2. 010 Editor has evaluation period so you can use it for free for some time. Let's try it on NOLF.
-Download and open DTX-LithTech2.0.bt template from research in 010 Editor.
-Open any DTX texture in 010 Editor.
-Press F5 either in hex windows or template window and select DTX or template and press Run

-You can see the result of the template in Variables and all the parameters
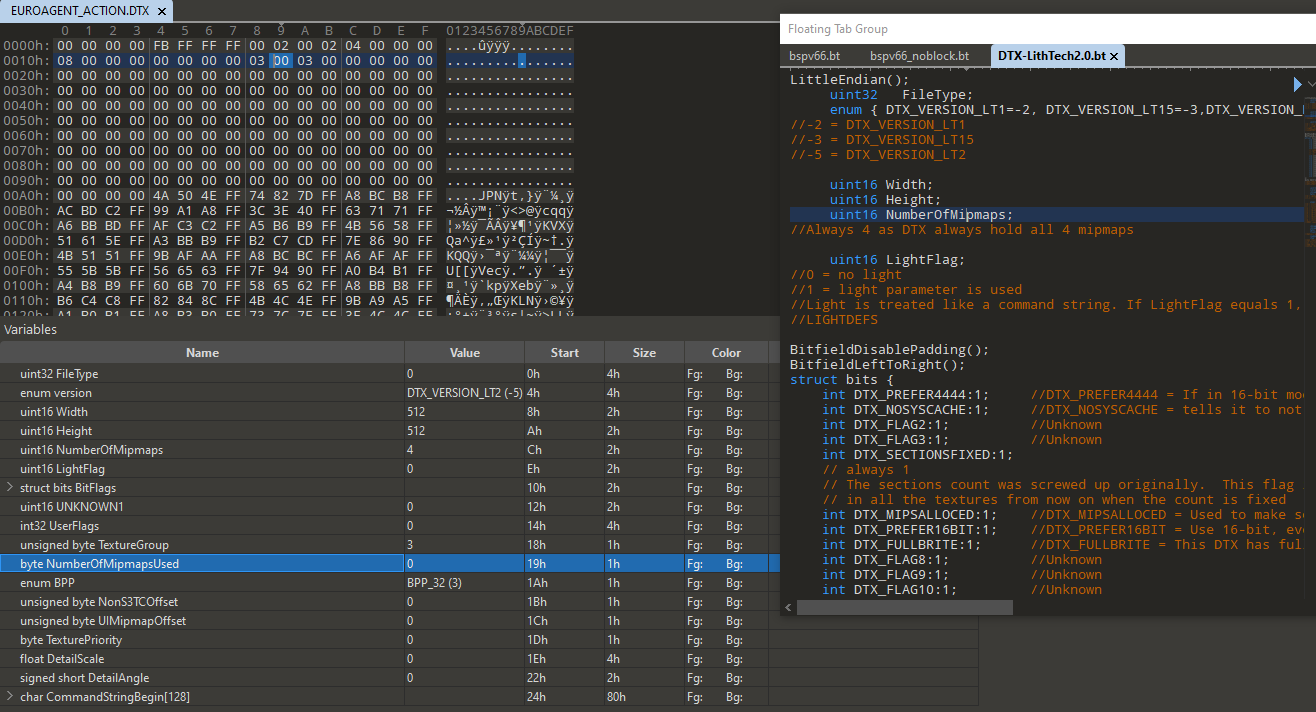
You can write your own templates (tutorial), for example if your want to research DTX v1.5 (I researched it already). I did it this way: changed texture settings in DEDIT one by one and compared original DTX and changed DTX to find bytes that were changed. See DTX v2 template, I tried to comment it a lot.
So, long story short, let's transfer this information. Batch convert procedure saves images as 32bit uncompressed. So the only values we need to take from upscaled DTX are Width/Height and BPP (image depth and compression), everything else we transfer from original game texture.
Issue. I had one texture in NOLF with wrong DTX version in header but correct DTX v2 structure. And since my script had some checks - it did't proceed it. I had to manually fix DTX version byte in 010 Editor for it.
Instruction
- Install Python 3, copy main.py to any folder.
- First, let's try to just read the DTX file and see all the info
python.exe main.py --input "C:\Textures\Example.DTX" --readHere is the output. We see for example DTX flags used and number of the material of the texture (named Texture Group), command string if used etc.

- We can read the information from all the DTX files and create csv file with this information to open in any sheet editor (Excel, Google Sheet). Script will append new files information to one csv table.
python.exe main.py --input "C:\Textures\Example1.DTX" --table "C:\NOLF\out.csv"
python.exe main.py --input "C:\Textures\Example2.DTX" --table "C:\NOLF\out.csv"
python.exe main.py --input "C:\Textures\Example3.DTX" --table "C:\NOLF\out.csv"
This way we can find some errors, originally present in game. For example, I found 8 errors in NOLF with not working parameters (yellow on the screen. In this case command string parameters needed to be divided by ; not :). You can fix this parameters later by hand in DEDIT.
- Now let's transfer all the information from original DTX files to upscaled files.
python.exe main.py --input "C:\Textures\Example1.DTX" --output "C:\Textures-Upscaled\Example1.DTX"
python.exe main.py --input "C:\Textures\Example2.DTX" --output "C:\Textures-Upscaled\Example2.DTX"
Aaaaaaaaaand this part is done. You have a lot of upscaled DTX files with settings transferred from original files.
P.S. You can find name of the texture materials in REZ packs of the game, usually in txt file with name like Surface or Material. So you can see that material number 10 is for example wood, or metal, depends on the game.
Manually fixing DTX parameters
- Copy DTX file you want to fix to your project in DEDIT to Textures folder (DEDIT2.2\Project0\Textures\).
- Open DEDIT and your project. You'll find your textures in Textures.
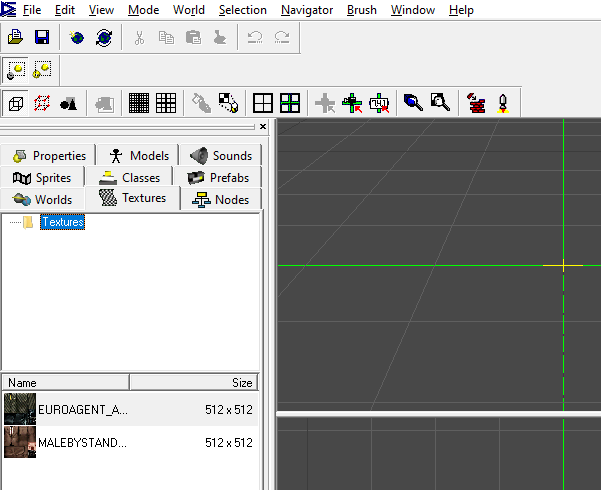
- Right click on texture name - Texture Properties.
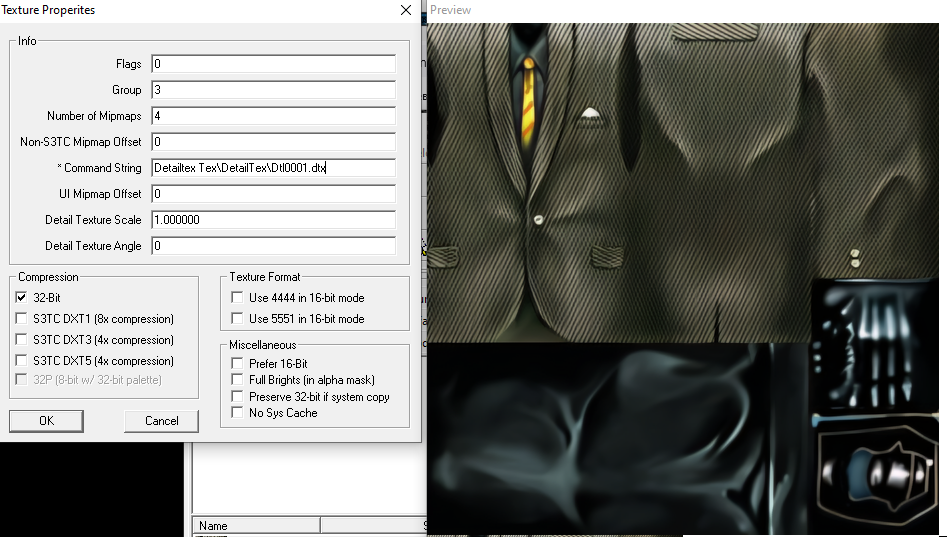
- Edit what you want to edit/fix and press OK. DTX is saved immediately
Now you have ready upscaled DTX files and you can take them and pack them back to new REZ packages to use in your mod.
Rescaling DAT files
Now we'll need LithTech DAT UV Vectors Upscaler script for 010 Editor. It was written by snobel from TTLG forum. I really tried to rewrote it to python to be free from 010 Editor, but I'm not so capable in programming. We'll need all the files from there.
UpscaleDAT.1sc is the upscaling script, and *.bt files are templates used by the script. It is highly recommended to try the template for your version of the game for all the DAT files you want to proceed. For example for NOLF I found several non-standard levels with some information missing and bspv66.bt template being applied with errors. So I changed it a little to be compatible (bspv66_noblock.bt). I also created and tested a template for AvP2 cause there was none (bspv70.bt).
It's highly creative work and you may need to rewrite upscaling script a little for your game/engine version.
Usage
- Download all the files to some folder. Open UpscaleDAT.1sc file in 010 Editor. You need *.bt files to be in the same folder.
- Change this row, writing template for your version of the engine:
const char Template[MaxChar] = "bspv66.bt";For example, if you want to upscale AvP2 levels, you need to replace it by:
const char Template[MaxChar] = "bspv70.bt";- Press F7 button in 010 Editor. Enter the scaling factor (the scale of the upscaled textures you'll use. If they are 4 times bigger than the original - set 4.0).
- Select the files you want to proceed (you can proceed several files at once).
- Select the folder for the result.
And after a while you'll get your modified DAT files. Pack them to your mod REZ files - and the upscale pack is done.
Tricky troubleshooting
As I said before, in NOLF I found out that some sprite textures from SFX folders were improperly used in level models causing scaling issues. So I was forced to revert UV vectors upscaling just for this textures.
Let's take a look at the structure of the DAT file (I ommited all the unused information):
struct WorldHeader header
struct WorldInfo info
struct WorldTree tree
struct DEBUG_BYTE
struct WorldModelHeader modelHeader
  struct WorldModel model[X]
    struct WorldBSP BSPData
      struct LTString WorldName
      struct WorldTexture WorldTextures
      struct Surface Surfaces[Y]
        struct LTVector UV1
          float x
          float y
          float z
        struct LTVector UV2
          float x
          float y
          float z
        struct LTVector UV3
          float x
          float y
          float z
        ushort Texture
All the geometry blocks (called WorldModels) on the level are listed in model[X] array.
They have individual WorldName (like Door1b or MoonFlare or Terrian15 or SkyBox5) and a list of used textures in WorldTextures separated by 00 byte.
Each model had several Surfaces, each using one texture from the list. Texture is defined by index number from 0 to Y (if it is 9 - it is 9th texture from the list counting from 0). Surfaces aren't ordered by texture index so be carefull.
And finally each Surface had three properties for UV LTVector: LTVector UV1, LTVector UV2, LTVector UV3.
- UV1 is the starting position of the texture in x,y,z dimensions. Script does not multiply it
- UV2 and UV3 defines streching of the texture in height or width (and texture angle as well) on the surface. Multiplying x,y,z dimensions by scale factor allows us to use bigger textures. This is the only thing my script changes in DAT file.
Example from M&M IX: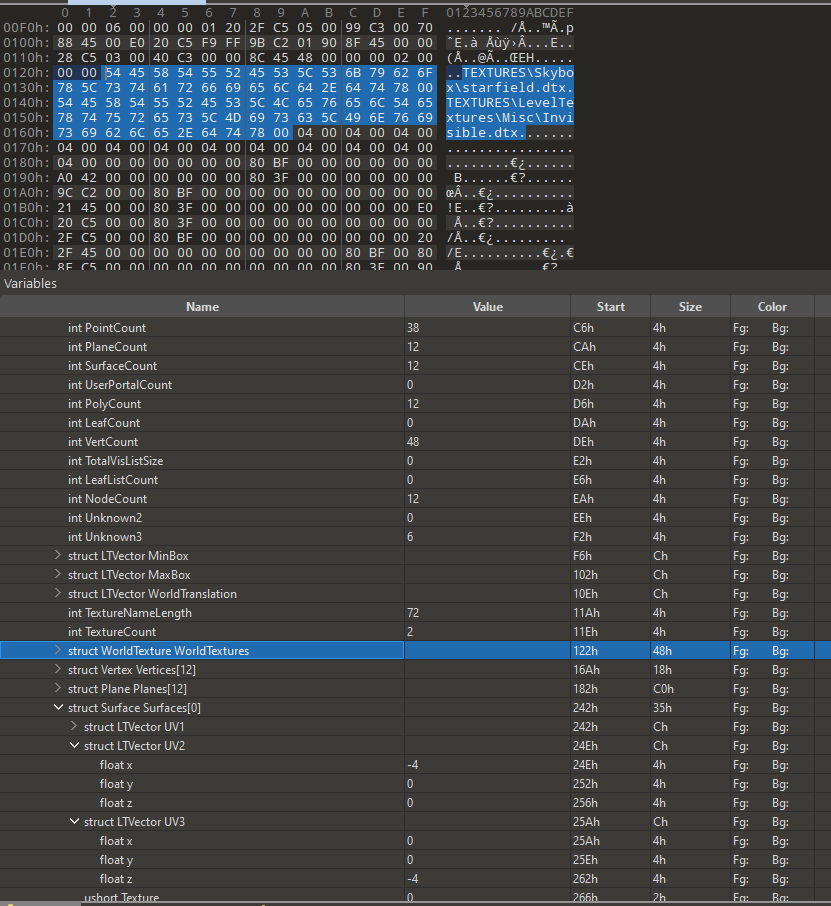
Bug #1. MoonFlares
It's just an example of the things I encountered. Screenshot by user TP555 1981. Because of the sprite texture used for sun flare we get such visual bug.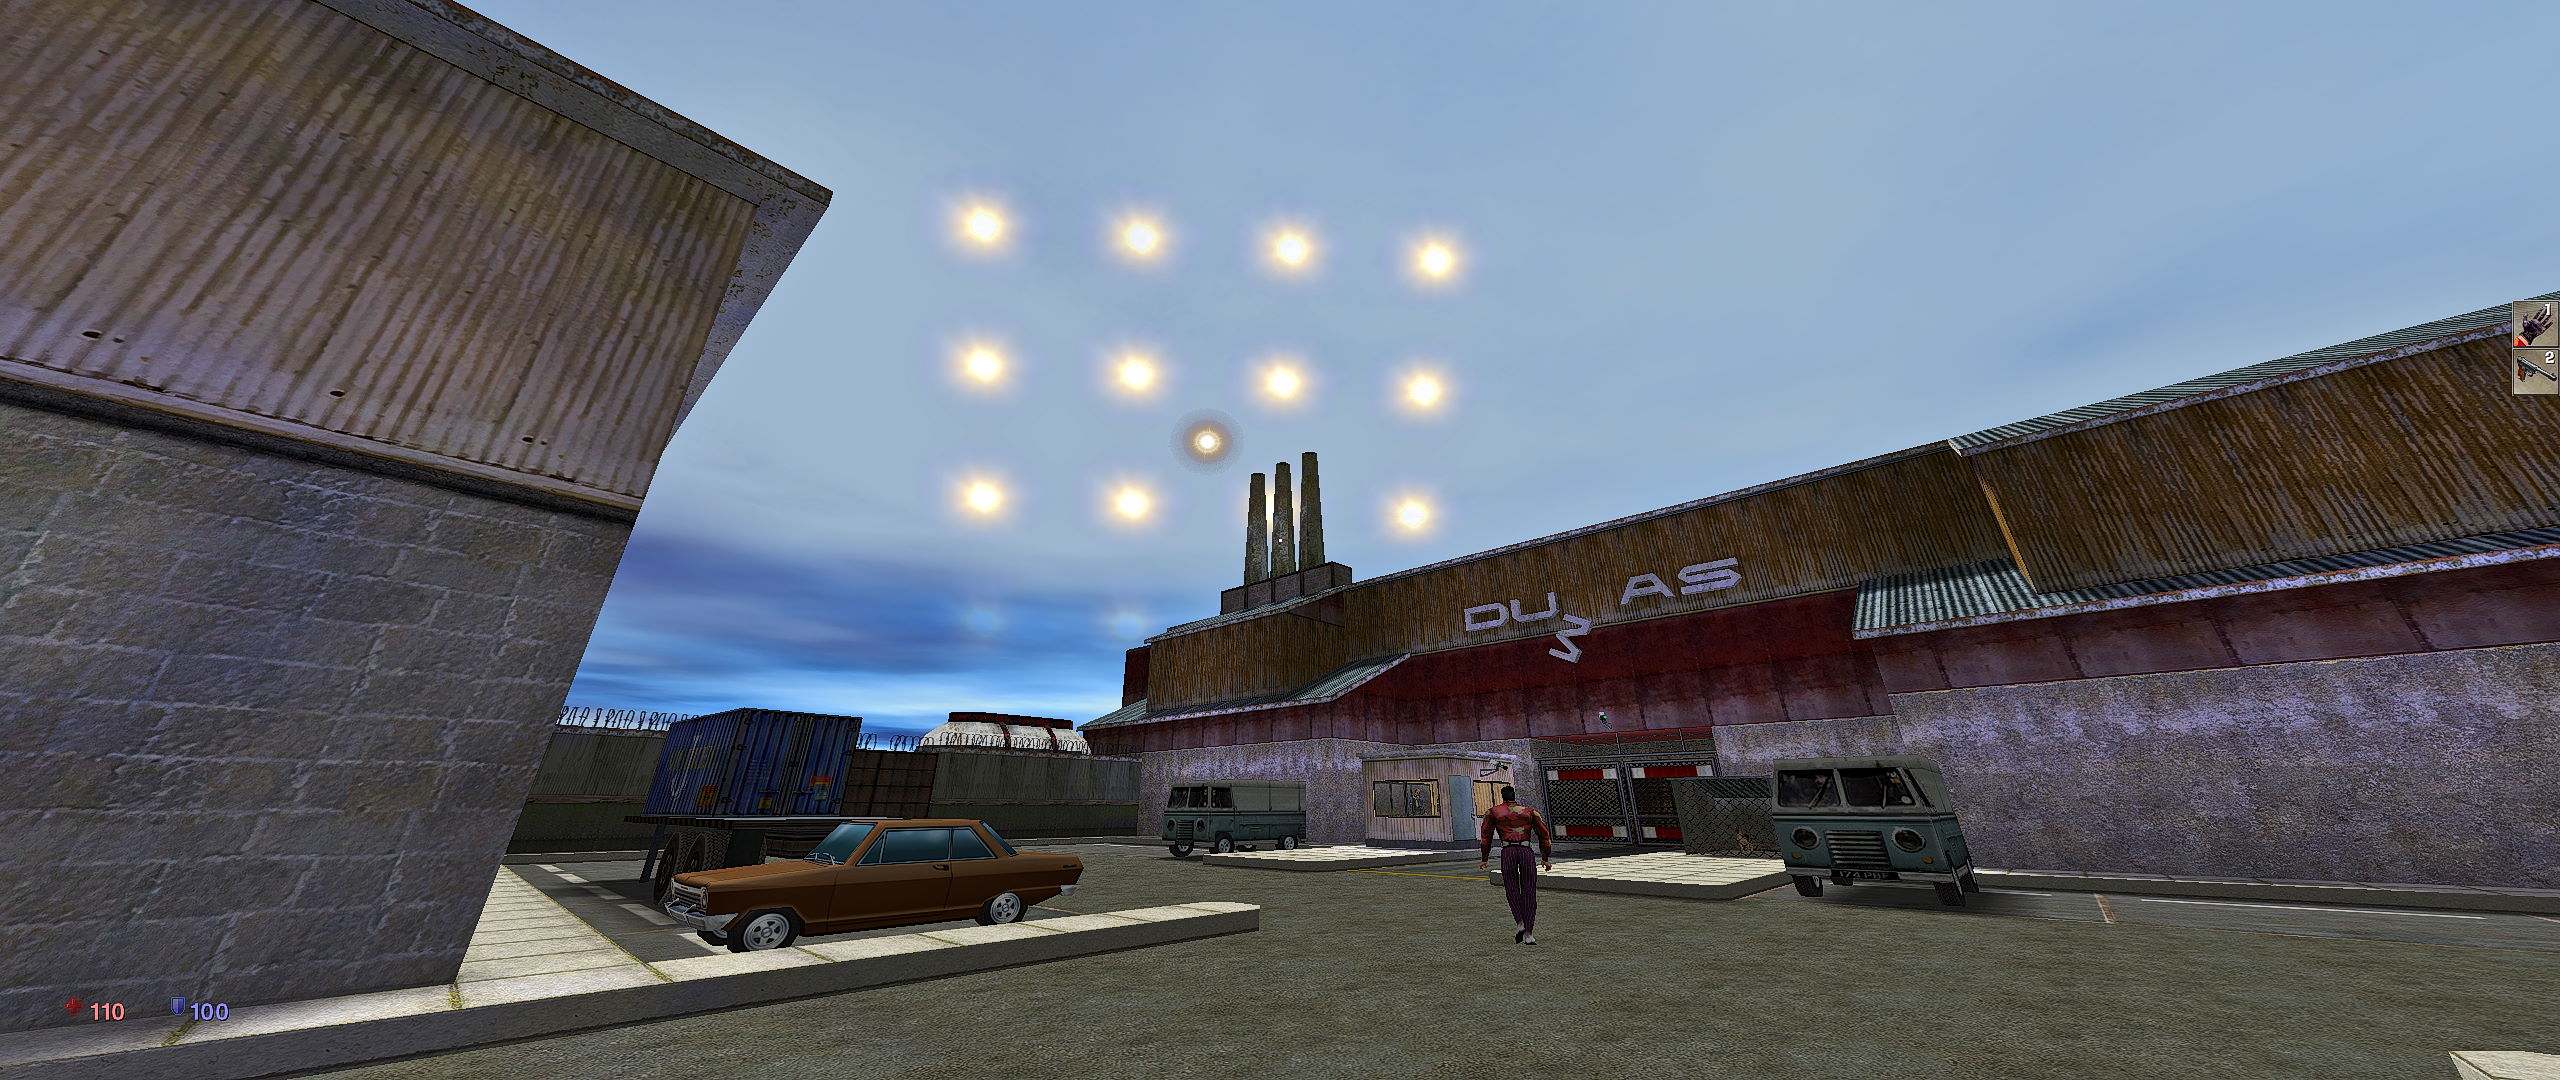
For this example we must search for SFX folder textures used for WorldModels. I searched every DAT file and found several concurrences in several files. For example M01S04.DAT from NOLF. We had several cases of SFX, but only the first is the case we need (others are in the and of the file and are properties of WorldObject structure we do not use/edit).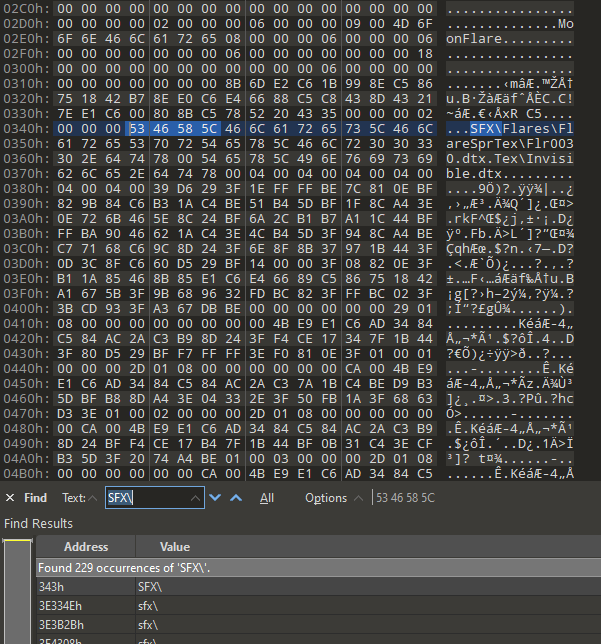
We can press Ctrl+J and jump to the variable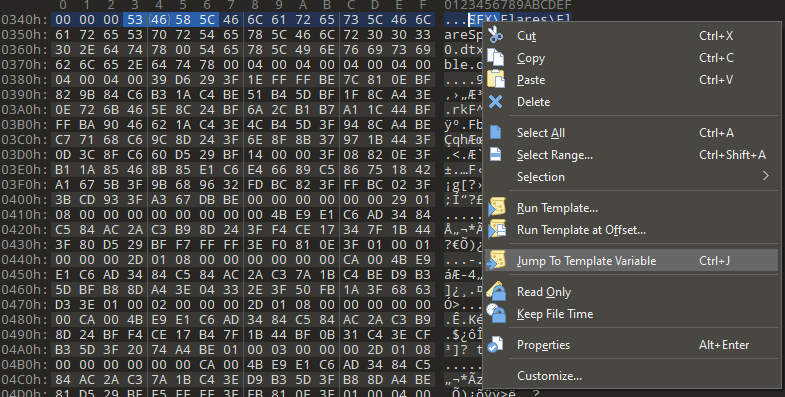
We see that it is MoonFlare model with 2 textures and 6 surfaces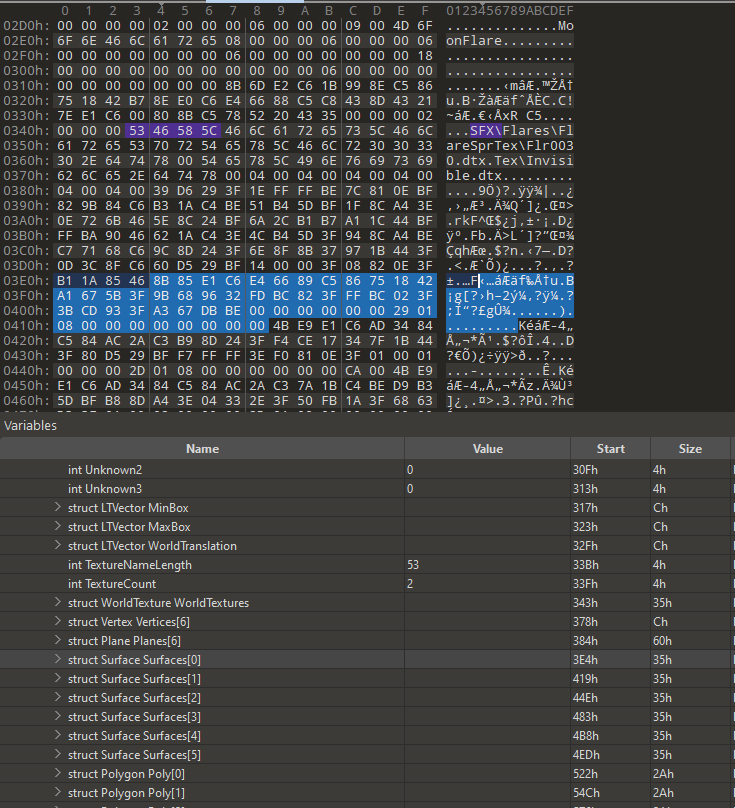
Now we open in parallel windows original DAT file and upscaled DAT file and copy surfaces information from one to another so MoonFlare model will use non-upscaled vectors. I just selected all the bytes of the surfaces and copied them. We don't need to search for textures number cause in this case both the used textures (Flr0030.dtx and Invivisble.dtx weren't upscaled)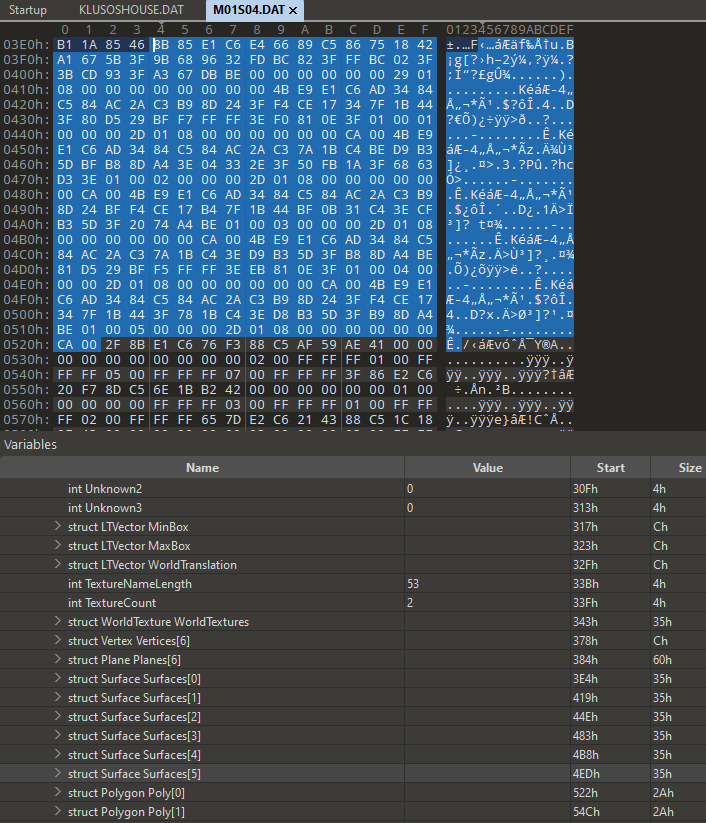
Bug is fixed
Bug #2. Flares
It appears that game sometimes uses TEX/Flares textures for sprites instead of SFX. Screenshot by user TP555 1981.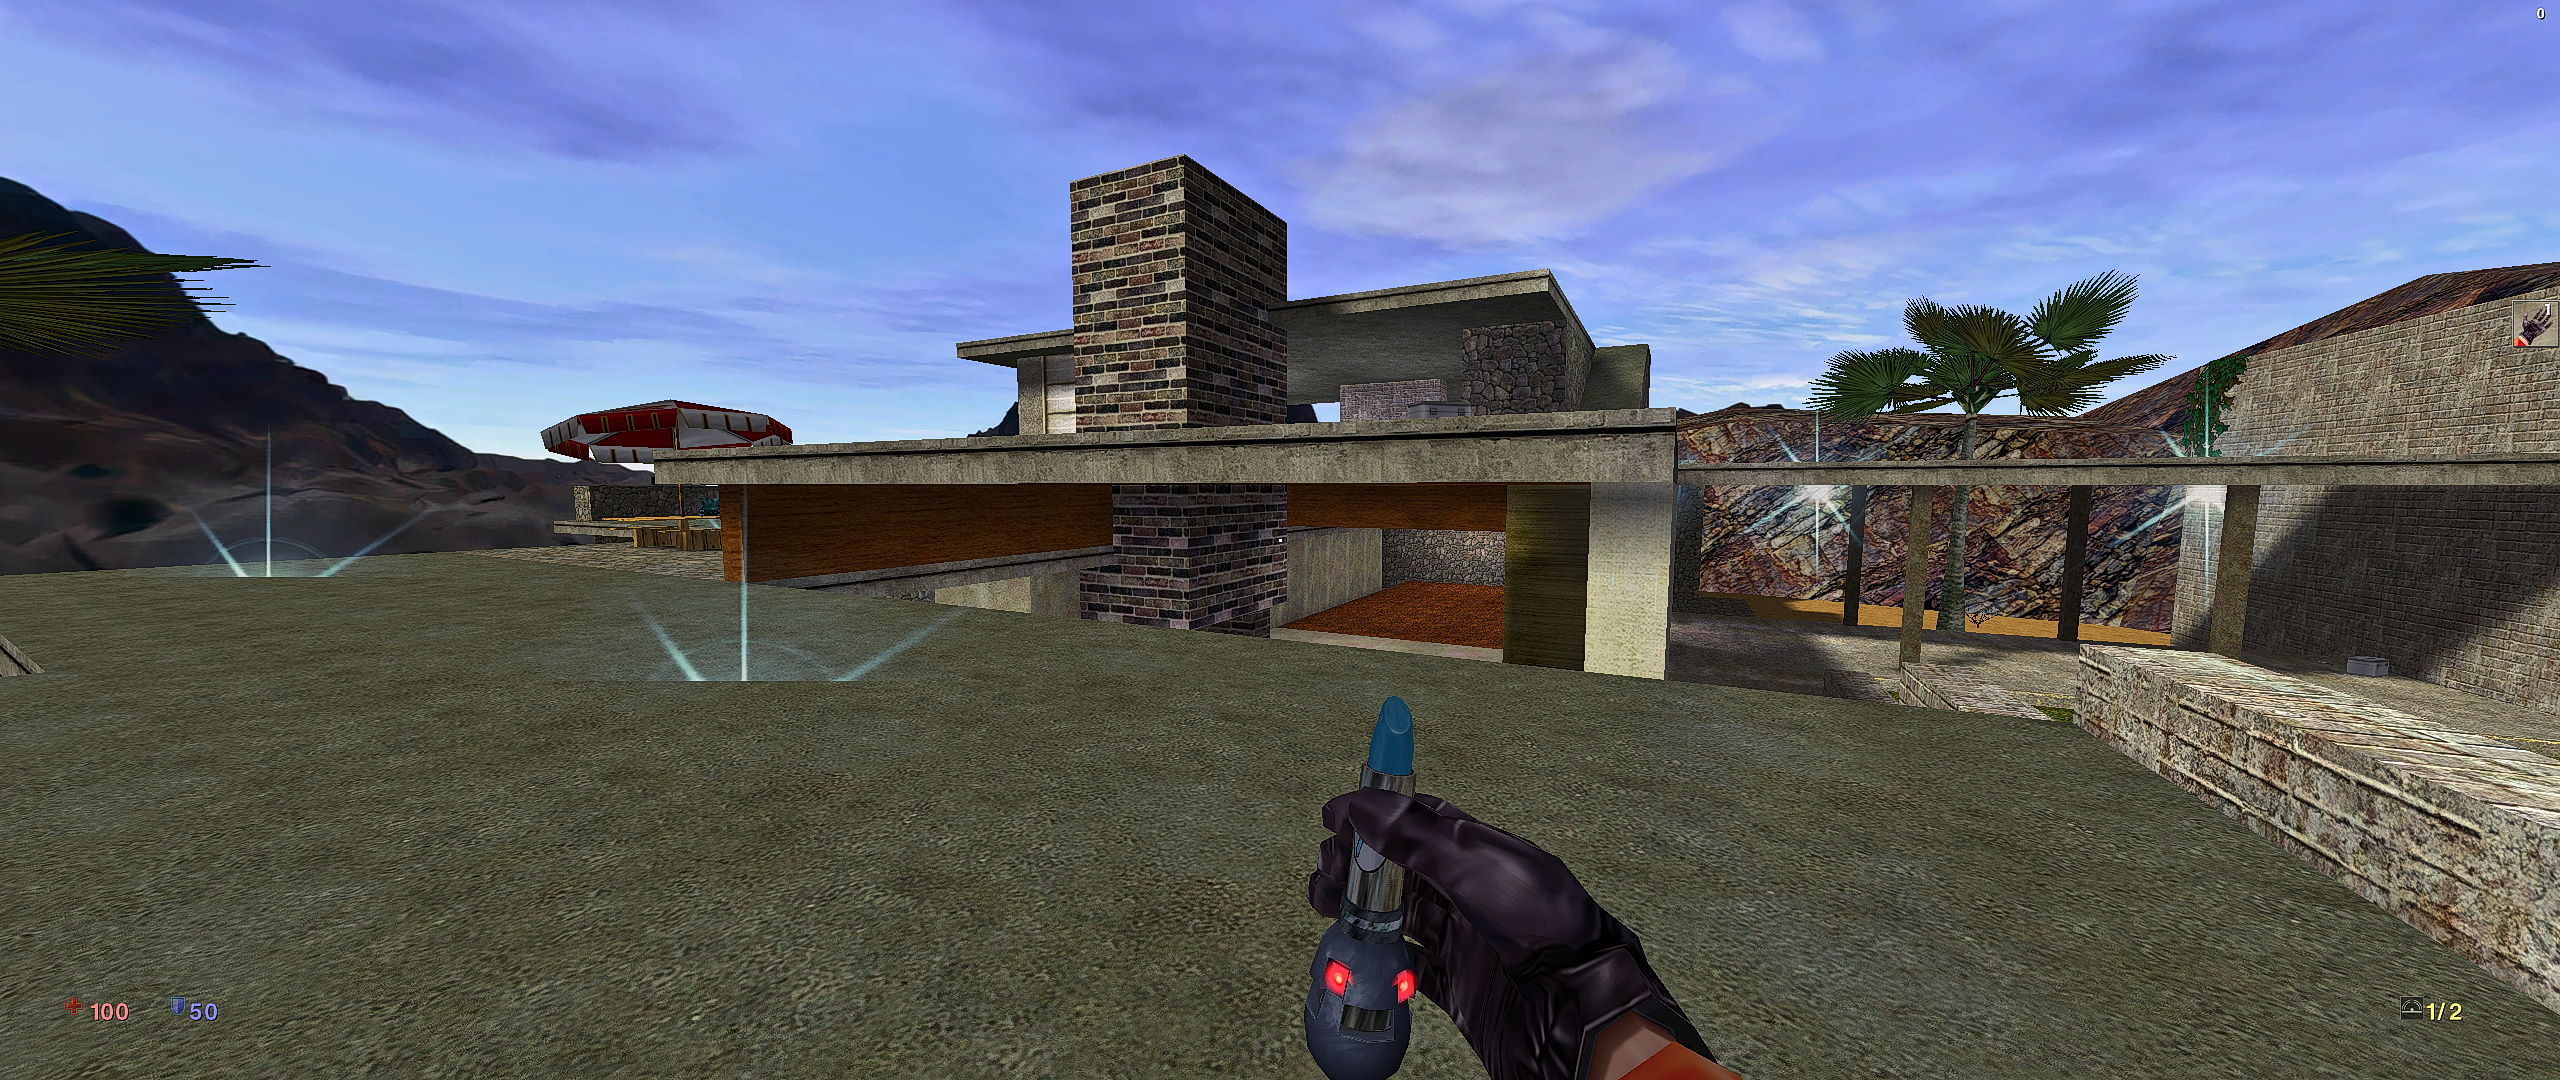 I fixed it just by removing upscaled TEX/Flares at all
Bug #3. Flares cleanup
I removed TEX/Flares folder, but what if TEX/Flares used somewhere in the levels for WorldModels?
I searched once again for TEX\Flares and found them in one file RUINS_DM.DAT, used in four models and reverted their surface's vectors
Bug #4. SFX Cleanup
It's just an example of how to fix more complicated vectors. Let's search for SFX\ once again. And its M09S03.DAT.
Its PhysicsBSP model (model # 433) with very long textures list with 214 textures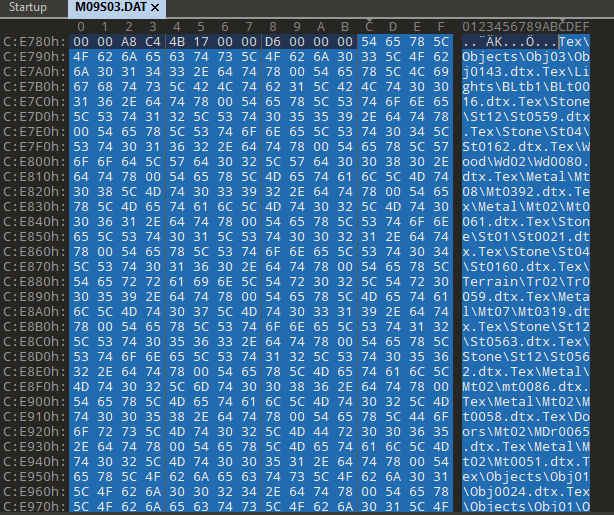
But we can't revert all the surfaces cause only one texture is bugged, all others are correct. I copied list of the textures to txt file, replaced 00 bytes by new line characters and found that SFX/smoke/FlareSPRTEX/Smk01.dtx is a texture number 183 (counting from 0).
Now we can search for Variable Value 183. I used search by value with such parameters. You'll get a lot of results but eventually you'll get to ushort Texture with your number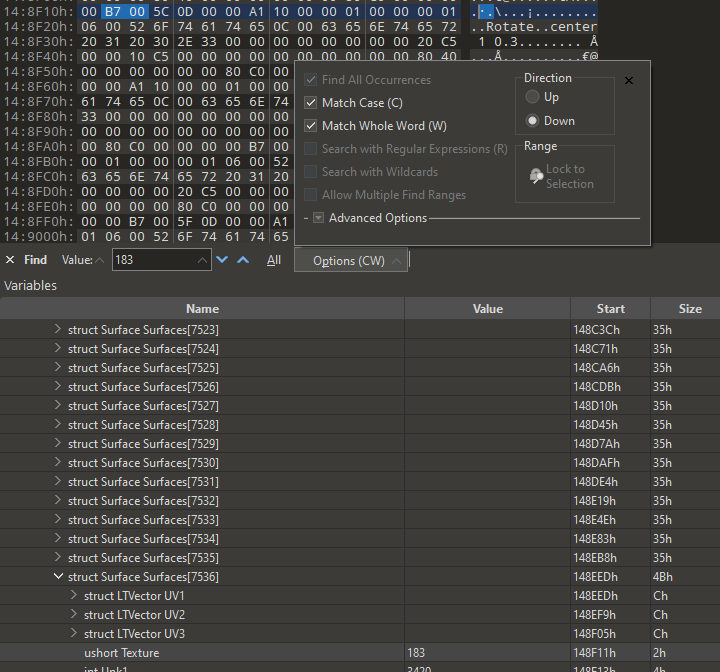
Now we know that surfaces we were looking for were 7536 to 7559. But they don't fit to the screen so it's hard to copy the block. We can use selection by address. Remember the start address of the beginning of surface 7536 and the end address of surface 7559 (start address is 148EEDh on the screen).
Now right click on any place and Select Range
You can use HEX or Decimal addresses, and choose Start Address + End Address.
And finally use select range on your original file and select range on your upscaled file, and copy selected bytes from one file to another.
That's very painstaking work and require a lot of accuracy but you'll do it. Just remember to do backups.
Bug #5. Sprites again!!! Let's edit SPR files
This was found just recently. Look at the center of the screen in full size. You'll see INVISIBLE text. This is present even in vanilla game.
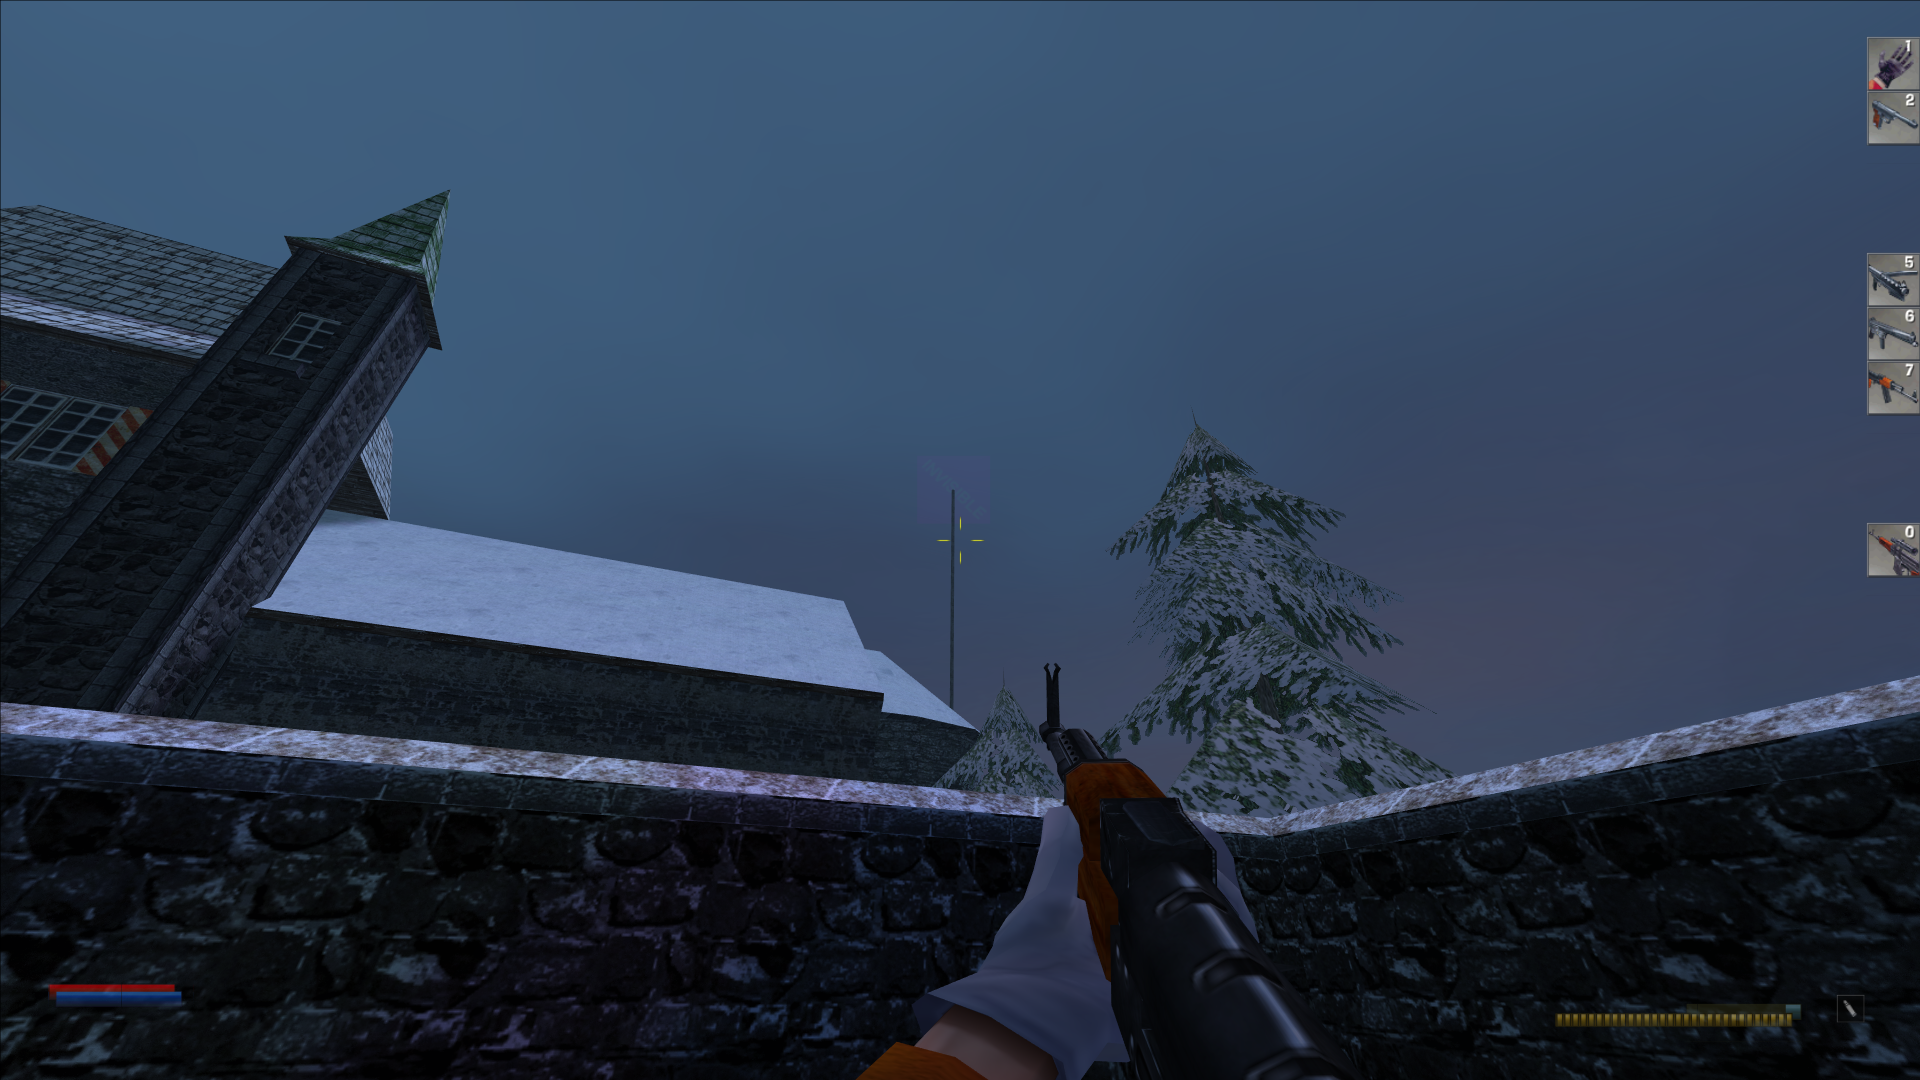
And also this. For some reason developers used this image as sprite and it's oversized upon upscaling. And we can't edit anything in DAT to fix this
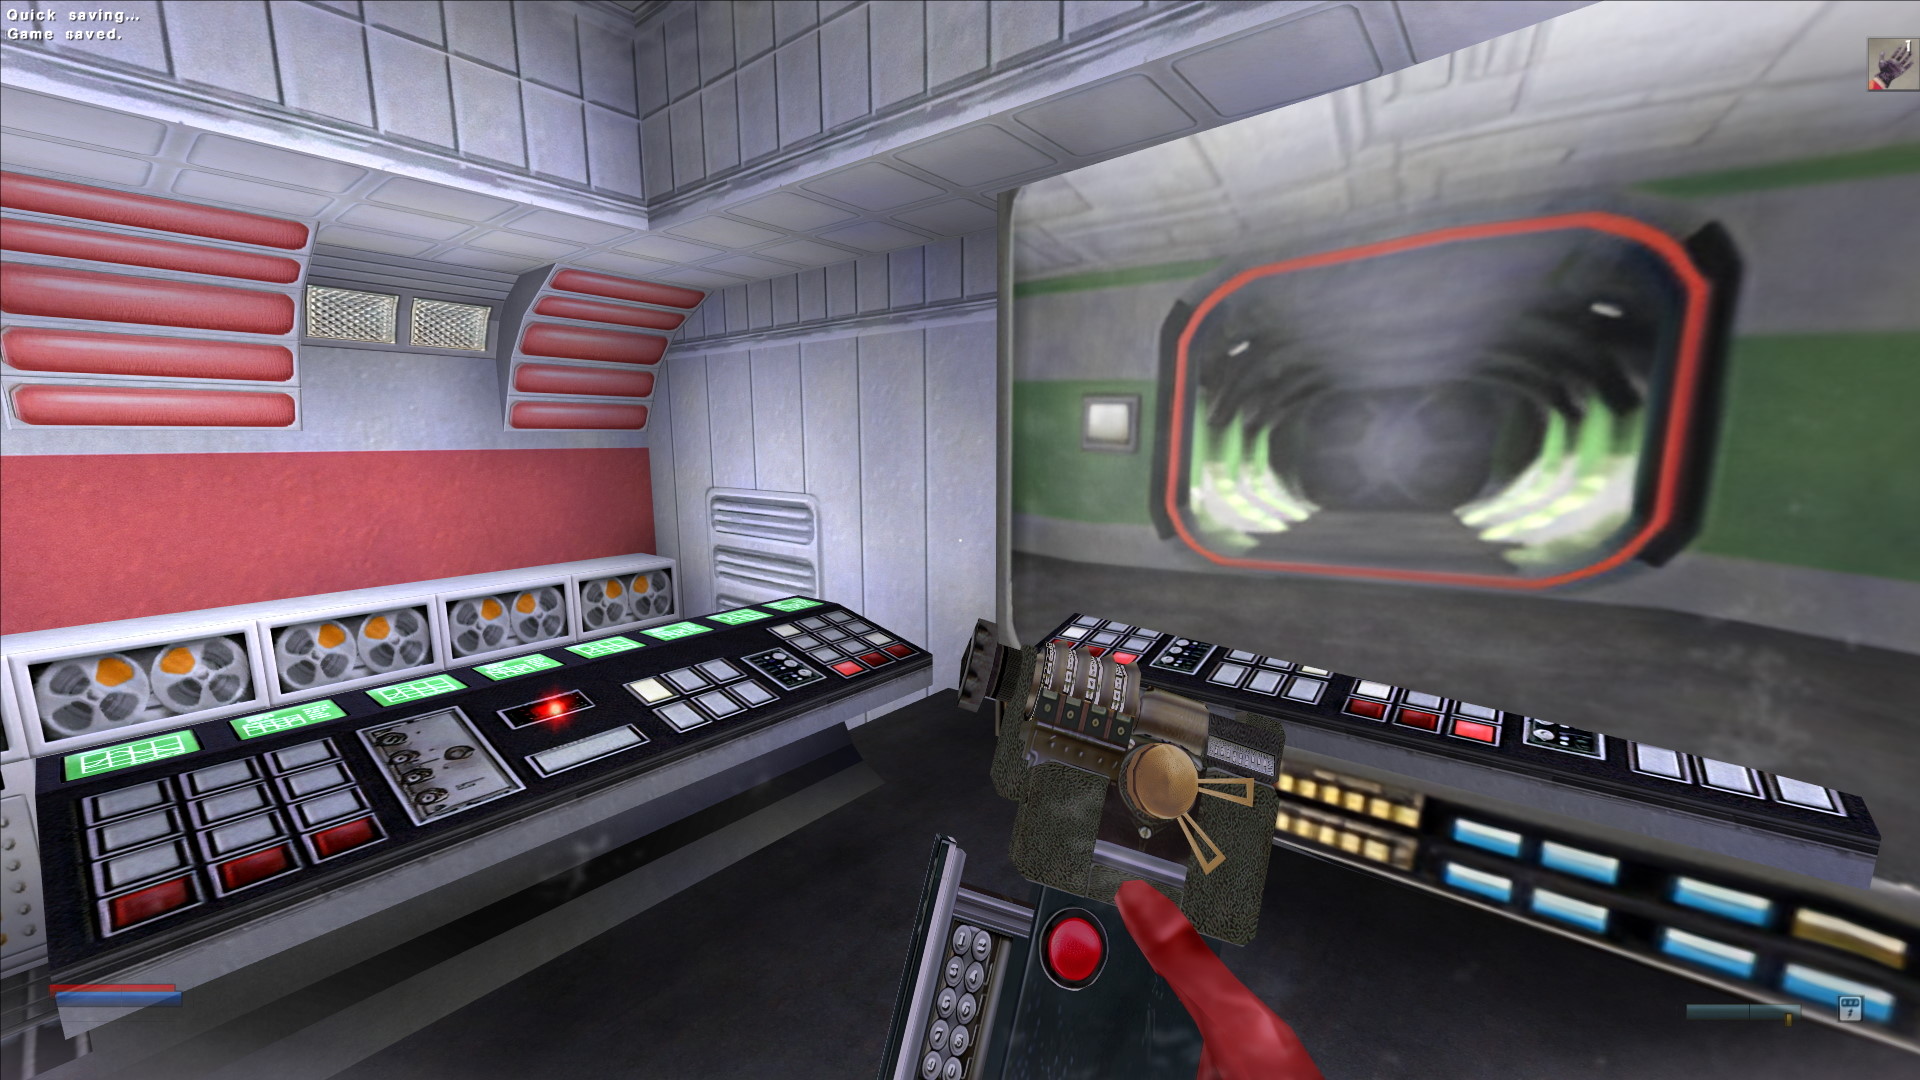
And this is how it supposed to look
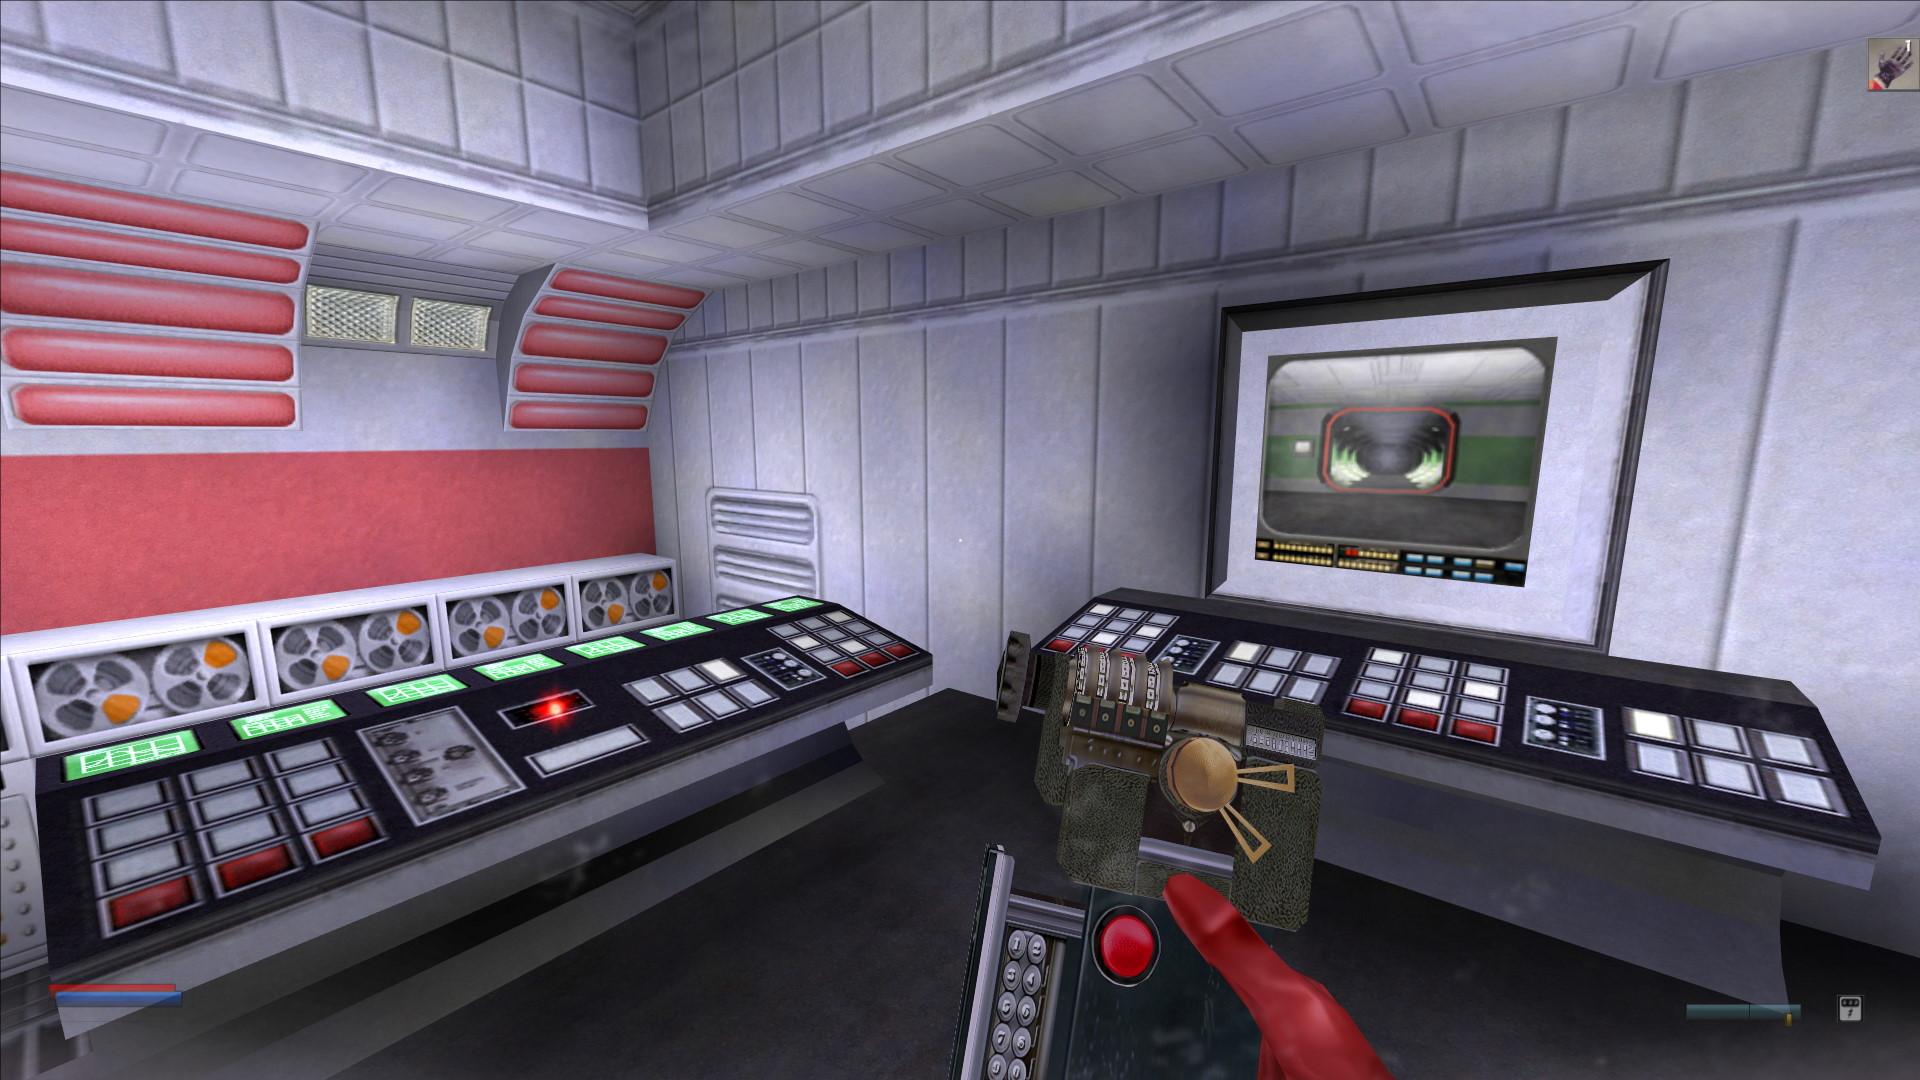
Ok, let's fix this. The images for monitor are:
TEX\OBJECTS\OBJ13\OBJ0638.DTX
TEX\OBJECTS\OBJ13\OBJ0639.DTX
Used by sprites
SPR\SPR00037.SPR
SPR\SPR00038.SPR
I suppose we don't know if these textures are used anywhere else. If they used not only as sprites but as textures, and we will delete upscale versions - monitor will be rendered in normal size but anywhere on the level this texture will be corrupted. So why check and recheck and recheck.
Let's create a walkaround.
We can open SPR file in text editor
I even decrypted some parts of the header for this format, but we will not use it. The idea is that I rename for example part of the file path: Tex to 1ex. You can only use the same length for the texture path and name as in original file. I don't think you'll want to decrypt SPR hex format and search for name length value and correct it. So it's easier to just change one symbol. 
Next step is to actually create new 1ex\Objects\Obj13\ folder and put there original Obj0638.dtx from original game. Now we pack edited sprites and new folders with texture to REZ file.
This way we can force any SPR file to use any texture we want, original or upscaled without the need to check DAT files and check if DTX world textures used anywhere else. Our fixed sprite will only use the texture we set inside it.
For the first screenshot I created real INVISIBLE.DTX texture and forced sprite to use it instead of game original "invisible" (not really) texture

MoH Pacific Shaders
MoH Pacific Shaders Full Version 1 commentReshade files needed for complete instalation of the mod

Medal of honor airborne weapons
MoHPA Weapon Overhaul mod Full Version 7 commentsimported the thompson, garand , springfield and BAR from MoHA over to MohPA

Mohpa weapons enhancements
MoHPA Weapon Overhaul mod Full Version 3 commentsthe first release of the mod -added sling mountson the BAR, Springfield, Thompson and M1 Carbine -Added Oiler to the M1 Carbine -Added springfield Armoury...

Medal of Honor: Pacific Assault Director's Edition
OtherThis simply adds the Pak7.rez file, the International Timeline, and Music Player all within the Director's Edition of Medal of Honor Pacific Assault into...




Hi,
There is someone who knows how to switch bots weapon ? It's for inscrease realism in the game. For example : switch carbine M1 for springfield 1903.
I've almost done it (with quickbms) but finally it crashed :(
WE NEED BOTS TO PLAY !!!
The multiplayer master server was shut down a while ago, just so people know.
Plz create Cod Zombies for this game like Medal of Honor Mlied Assault!!! Please!!!
Id tech 3?!? 3!?! WTF? How the hell this can be Id tech 3 engine? I would say it's more like a early version of Id tech 4!
this have mods/skins i have saw that someone had m4a1 and mac 11 weapons but dont ask me where to get em i dont have a clue but if someone knows where then hope he tells
personally your crizisims is ****
man no BOT patch? like Allied assault? please
i want an Army Men mod!!
Too damn short MP is pretty kickass though. I got it for 8.00 sooo worth every dollar. btw Darkdrium if it's laggy upgrade yer RAM cuase it ran great mp and single player and AI will die... shoot dem in da head. ANYWAY Imma go look for maps for this game now.